

As the warm sun kisses the orchards of Washington, ripe cherries burst with flavor, beckoning us to indulge in the quintessential taste of summer. And what better way to honor these crimson gems than by baking a delicious Washington cherry pie? Join us on a culinary adventure as we unveil the secrets to crafting the perfect pie that will have your taste buds dancing with delight.
A Symphony of Sweetness – The Washington Cherry
Nestled in the fertile valleys of Washington state, cherries thrive in the temperate climate, developing a sweet-tart flavor that is unparalleled. Whether you prefer the boldness of Bing cherries or the delicate sweetness of Rainiers, each variety lends its own unique charm to our pie.
The Pillowy Perfection – Crafting the Pie Crust
No cherry pie is complete without a flaky, buttery crust that cradles the luscious fruit filling. Follow this foolproof recipe to create a crust that is as beautiful as it is delicious:
Ingredients:
- 2 ½ cups all-purpose flour
- 1 teaspoon salt
- 1 cup cold unsalted butter, cut into cubes
- 6-8 tablespoons ice water
Instructions:
- In a large mixing bowl, whisk together the flour and salt.
- Add the cold butter cubes to the flour mixture and use a pastry cutter or your fingertips to work the butter into the flour until it resembles coarse crumbs.
- Gradually add the ice water, one tablespoon at a time, mixing until the dough comes together. Be careful not to overwork the dough.
- Divide the dough in half, shape each half into a disk, wrap them in plastic wrap, and refrigerate for at least 30 minutes before rolling out.
Bursting with Flavor – The Cherry Filling
Now, let’s turn our attention to the star of the show – the cherry filling. With just the right balance of sweetness and acidity, this filling will elevate your pie to new heights of deliciousness.
Ingredients:
- 5 cups fresh Washington cherries, pitted
- 1 cup granulated sugar
- 1/4 cup cornstarch
- 1 tablespoon lemon juice
- 1/2 teaspoon almond extract (optional)
- 1/2 teaspoon vanilla extract
Instructions:
- In a large mixing bowl, gently toss together the pitted cherries, sugar, cornstarch, lemon juice, almond extract (if using), and vanilla extract until well combined.
- Let the cherry mixture sit for about 15 minutes to allow the flavors to meld together and the juices to thicken slightly.
Bringing It All Together – Assembly and Baking
With our crust rolled out and our filling prepared, it’s time to assemble our pie and let the oven work its magic.


Assembly:
- Preheat your oven to 400°F (200°C).
- On a lightly floured surface, roll out one disk of pie dough into a circle large enough to fit a 9-inch pie dish. Carefully transfer the dough to the pie dish and gently press it into the bottom and sides.
- Pour the cherry filling into the prepared pie crust, spreading it out evenly.
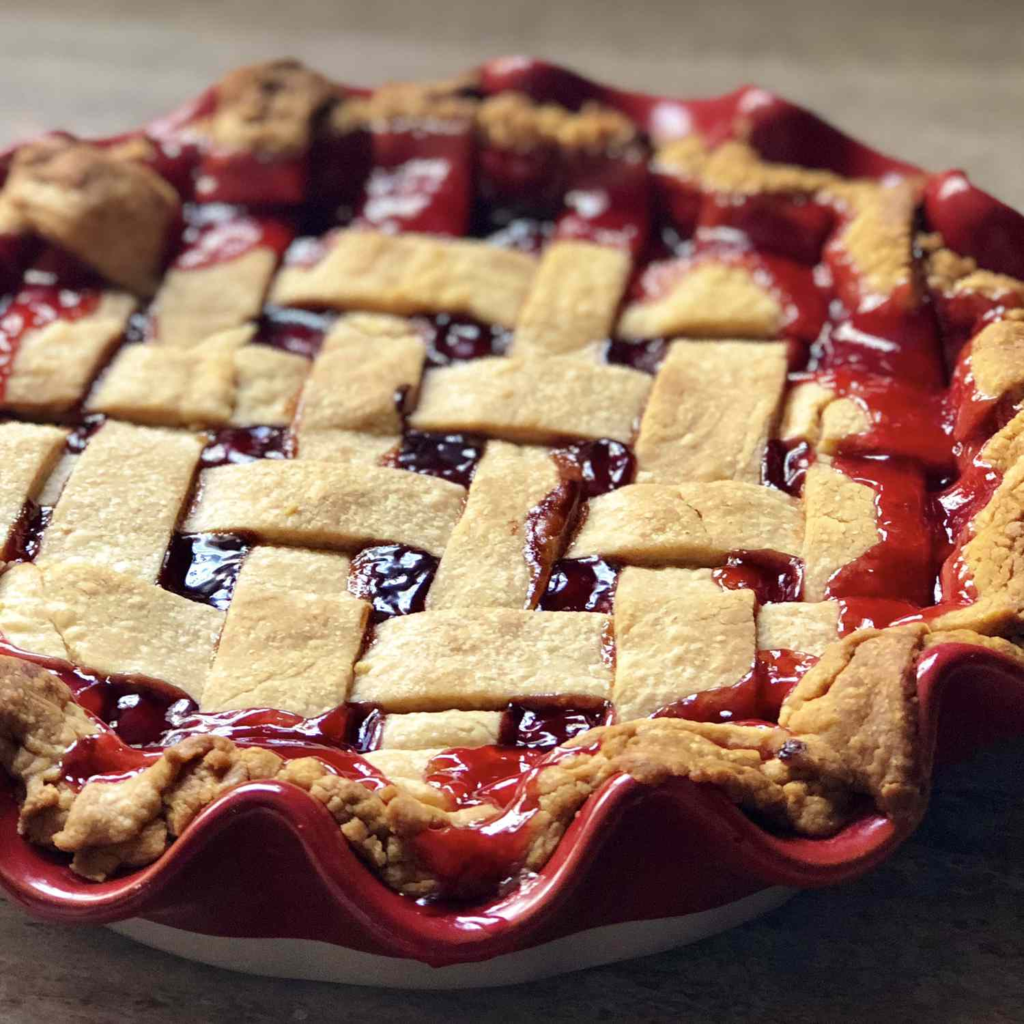
- Roll out the second disk of pie dough and place it over the cherry filling. Trim any excess dough and crimp the edges to seal the pie.
- Cut slits in the top crust to allow steam to escape during baking.
Baking:
- Place the pie on a baking sheet to catch any drips and bake in the preheated oven for 45-55 minutes, or until the crust is golden brown and the filling is bubbling.
- If the edges of the crust start to brown too quickly, cover them loosely with aluminum foil.
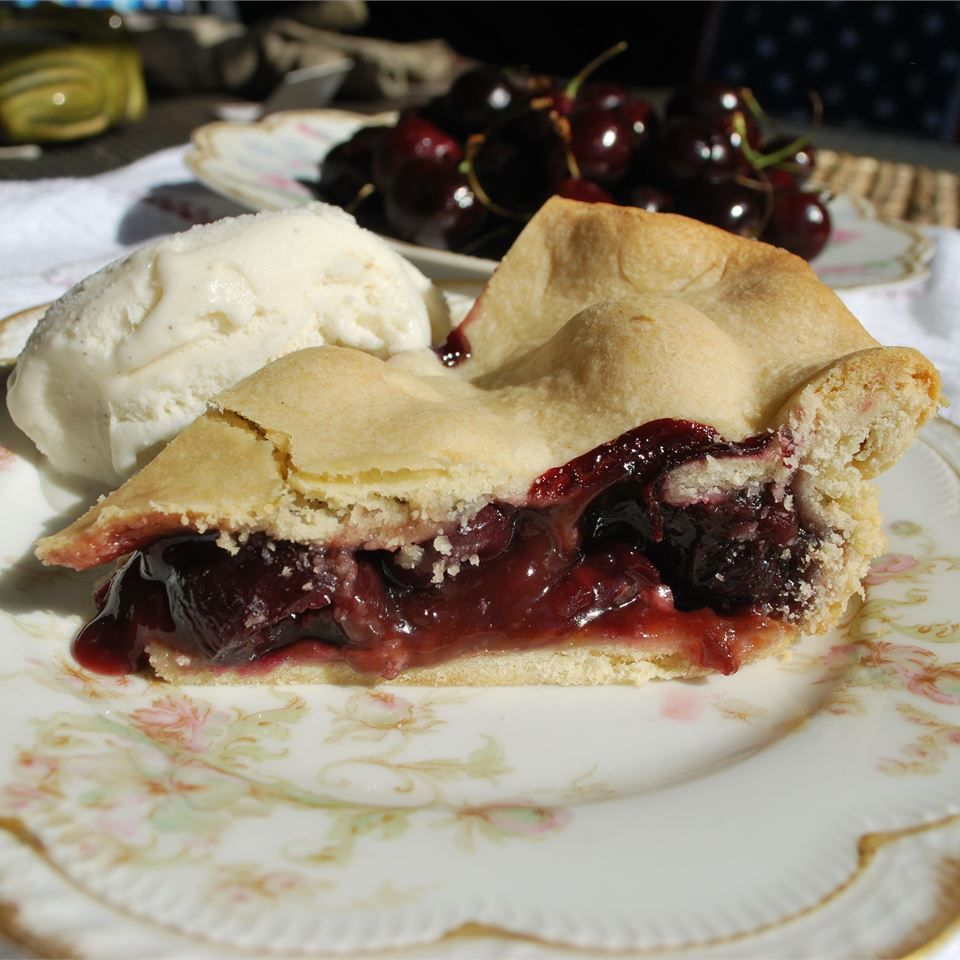
A Slice of Heaven – Serving and Enjoying
Once the pie has cooled slightly, slice into it and serve it warm with a scoop of vanilla ice cream or a dollop of whipped cream for the ultimate indulgence.
Conclusion:
In conclusion, baking a Washington cherry pie is not just a culinary endeavor; it’s a celebration of summer’s bounty and a tribute to the exquisite flavors of the Pacific Northwest. With a flaky crust and a luscious cherry filling, this pie is sure to become a favorite for all occasions.
Frequently Asked Questions:
1. Can I use frozen cherries instead of fresh? Yes, frozen cherries can be used as a substitute for fresh cherries in this recipe. Just be sure to thaw and drain them before using, and adjust the sugar accordingly based on their sweetness.
2. How can I prevent my pie crust from becoming soggy? To prevent a soggy bottom crust, you can blind bake the bottom crust before adding the filling. Simply line the crust with parchment paper and fill it with pie weights or dried beans, then bake it in a preheated oven for about 15 minutes before adding the filling.
3. Can I make this pie ahead of time? Yes, you can assemble the pie ahead of time and refrigerate it until you’re ready to bake. Alternatively, you can bake the pie ahead of time and reheat it in a low oven before serving.
4. Can I use a store-bought pie crust instead of making my own? Yes, you can use a store-bought pie crust if you’re short on time or prefer the convenience. Just follow the instructions for assembly and baking as outlined in the recipe.
5. How should I store leftovers? Any leftover pie can be stored in the refrigerator, tightly covered, for up to 3 days. Simply reheat individual slices in the microwave or a low oven before serving.